Tuesday, December 24, 2013
Turmeric Hot Cocoa & Maple Marshmallows
Check out this recipe and more on the new site!
This season I have seen tons of delightful posts of homemade marshmallows that look beautiful, pillowy, and delicious. I wanted to make some to add to my cocoa but found that they are essentially refined sugar and corn syrup. Not wanting to be left out of the fun, I decided to see if there was a way to make them with a healthier sweetener. I thought honey would be too intense and so I decided to experiment with maple. The results were a huge success: Fluffy caramel colored marshmallows that melt beautifully into cocoa.
I am by no means a marshmallow expert, so I took most of my cues from Martha Stewart as far as the how-to and simply switched the ingredients to be more "Naked Figgy." I also did use some refined sugar (organic powdered sugar) in making these because the marshmallows need to be rolled in something powdery to keep them from being too sticky. If you want to completely avoid the sugar, try rolling them in cinnamon or cacao.
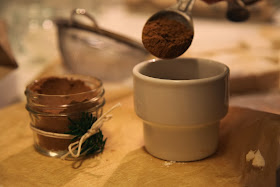
Adding turmeric to my cocoa is one of my favorite winter treats. Its flavorful and full of superfoods. For more info on the health benefits of turmeric check out my Turmeric and Fig Shake. For more info on the benefits of maca look at my Raw Avocado Tart recipe. The cocoa mix makes a great little gift in a small mason jar. Pair it with some homemade marshmallows for a last minute gift.
Turmeric Hot Cocoa:
2 1/2 tbsp raw cacao
2 tsp turmeric
1/2 tsp maca powder
1/4 tsp cinnamon
Put all ingredients in a jar. Heat 1 cup of milk or plant milk and whisk in 2 teaspoons cocoa mix. Sweeten with maple syrup, honey, or coconut sugar to taste.
Maple Marshmallows:
3 packets gelatin
1 cup cold water (split into two half cups)
1 cup maple syrup
1/4 tsp salt
2 tsp organic vanilla extract
oil for brushing
organic powdered sugar for coating
Pour gelatin into standing mixer and add 1/2 cup of water. Let this sit for at least 5 minutes. Meanwhile, put maple syrup, salt, and the remaining 1/2 cup of water in a small saucepan on medium-high heat. Martha Stewart says to heat until syrup reaches 238 degrees. I do not have a candy thermometer so I just heated it for 9 minutes.
At a low speed, begin pouring hot syrup into the stand mixer. Be careful because it will burn if it splashes on you. Slowly turn the mixer up to high and leave it mixing for 12 minutes, adding vanilla extract in the last minute. At this point the mixture should look like marshmallow fluff and will come off of a spoon in ribbons.
During the twelve minutes, line a baking dish with parchment paper and brush the paper with oil. When the marshmallow mixture is ready, pour it into the dish and allow it to firm up for about 4 hours.
When the marshmallows are firm, turn them out of the dish and onto a sheet of parchment paper coated with powdered sugar. Coat a knife with oil and slice the marshmallows into 1.5 inch cubes. Toss each marshmallow in the powdered sugar to coat.
Store marshmallows in an airtight container for 3-4 days. Homemade marshmallows do not stand up to flames well so use caution when roasting because they melt fast. I still managed to brown them a bit though. Enjoy!
Happy Solstice and Merry Christmas!
Monday, November 25, 2013
Eggnog & Cranberry Raw Holiday Cake
Check out this recipe and more on the new site!
For Friendsgiving I was put in charge of bringing dessert. Ok, I volunteered. While I'm known for bringing raw desserts, I thought maybe for the holidays I'd bake something. Then I realized Thanksgiving is the perfect day for raw desserts. Here's why: When I thought about all the heavy cooked foods we would be having for dinner, I realized nobody is going to have room for yet another decadent dish. And I was right. By the time we finished eating, I was in the mood for something a bit more refreshing. Fortunately, I decided to pass up the pies and took my standard cashew freezer cake to a new level by adding some holiday flavors.
The cake is one layer of salty, nutty crust, followed by a creamy dairy-free eggnog layer, topped with refreshing cranberry sauce. So much holiday goodness in one healthy dessert. And since it's raw, you won't have to use any valuable oven space. You can even make it a day or so ahead. I served this to a groups of my friends who do not usually eat raw foods and everyone loved it.
Just about everyone knows that cranberries are good for you. Heck, cranberry juice alone can cure a UTI. But most people only consume cranberries in the form of juice (usually pasteurized and with added sugar or corn syrup) or in cooked dishes during the holiday season. But the majority of the vitamins, antioxidants, and anti-inflammatory phytonutrients are in the flesh of the fruit and do not survive being cooked. This dish is a great way to consume the whole cranberry in it's raw form. Cranberries are incredibly tart on their own, but don't worry I added plenty of honey to make them palatable. This nutrient dense dessert is sure to please even the most skeptical guests at your holiday meal.
Enjoy and Happy Holidays!
Ingredients:
Crust:
1 cup raw walnuts
1 cup raw pecans
2/3 cup chopped dates
1/4 tsp celtic sea salt
1/4 tsp cinnamon
1 tbsp water
Filling:
1 1/2 cup cashews
1/2 cup pine nuts (or leave out and use 2 cups cashews)
1 vanilla bean scraped
1 tbsp fresh lemon juice
1/3 cup organic grade B maple syrup
pinch of salt
1/3 cup almond milk
1/4 tsp cinnamon
1/2 tsp nutmeg
Cranberry Sauce:
1 1/4 cup frozen cranberries, thawed (this makes them softer)
2 tbsp water
2 heaping tbsp runny raw honey
1. Put all crust ingredients in a food processor and pulse until moist and crumbly. If the mixture is too dry, add more water one tablespoon at a time.
2. Press crust into a 9 inch spring form pan and put in freezer. If you don't have one, line a pan with plastic wrap so that the frozen cake can be removed.
3. Put all the filling ingredients into the food processor and keep mixing until smooth and creamy. Scrape down the sides every so often to make sure everything is incorporated. It may take a few minutes to become creamy enough.
4. Pour filling over the crust and spread evenly with a spatula. Return to freezer.
5. Put all cranberry sauce ingredients in the food processor and blend until smooth and runny. It should be more of a smoothie texture than cranberry relish texture. If you need to, add more water one tablespoon at a time.
6. Pour the cranberry sauce on top of the filling and smooth it out with a spatula.
7. Place in the freezer for at least two hours. If you freeze it overnight, take out at least 45 minutes before serving to thaw.
I served it with whipped coconut cream. You can find that recipe here.
Thursday, October 31, 2013
Persimmon & Peppercorn Smoothie
Check out this recipe and more on the new site!
Like I said in my last post, although it is getting cooler, I'm not ready to say goodbye to smoothies. But I am adapting them to make them include some of my favorite fall flavors. One of those flavors is persimmon. Persimmons are supersweet and delicious. If you haven't had one, I'd liken them most to plums without the tartness. They also have more fiber than apples in addition to Beta Carotene, Vitamin C, and a host of other nutrients.
This recipe also uses pink peppercorns. You may not realize how different they are from black peppercorns. They are flaky and hollow, with a milder spice than black peppercorns, and a citrus-like flavor that pairs wonderfully with fruit. Give them a try, but of course the smoothie will still taste delicious without them.
Ingredients:
3/4 cup water
1/4 cup hemp seeds
1 persimmon, sliced
1 large banana, frozen
juice of 1/4 small lemon
1/8 tsp turmeric
1/8 tsp cinnamon
1tsp pink peppercorns
1. Put the water and hemp seeds in the blender and blend until you have a creamy white hemp milk. You do not need to strain the hemp pulp. If you do not have hemp seeds, leave out the water and instead use 3/4 cup of milk or milk alternative of your choice.
2. Add all the other ingredients and blend until smooth.
3. Garnish with pink peppercorns and serve.
Saturday, October 12, 2013
Slow Cooker Pumpkin Porridge
Check out this recipe and more on the new site!
Autumn is undeniably here with its chilly mornings. And while I'm not quite ready to say goodbye to smoothies, I have been waking up craving warm cooked breakfasts. One of my favorite breakfast recipes comes from the incredibly talented Sarah Britton of My New Roots. She is an absolute genius in the kitchen and I've never tried a recipe of hers that I didn't like. Her pumpkin pie amaranth porridge is incredible and just what I've been in the mood for lately.
Unfortunately, when I am in a hurry in the morning it can be hard to find time to cook a hot breakfast. So I decided to make my version of Sarah's pumpkin porridge in a slow cooker. You don't have to stir constantly or wake up early. Just throw the ingredients in, turn the slow cooker on, and wake up to a hot healthy breakfast.
For variety and nutrition's sake, I used three types of "grains" for my porridge: amaranth, quinoa, and oat groats. Amaranth is a grain-like seed that is packed with protein and calcium. Quinoa is a good source of complete protein as well. I like to use whole oat groats when possible because they are the least processed form of oats and they are full of soluble fiber. These three cereals together make for a nutrient packed bowl of porridge.
Ingredients
Makes 6 servings
1/3 cup quinoa
1/3 cup amaranth
1/3 cup oat groats (or steel cut oats)
1 1/2 cup pumpkin puree
2 cups coconut milk
2 cups water
1/8 tsp salt
2 tsp cinnamon
1/2 tsp turmeric
1 vanilla bean, scraped
maple syrup or honey to taste
Put all ingredients in your slow cooker and whisk to remove any chunks. Turn setting on low and get some sleep. When you wake, stir porridge and add sweetener of your choice. Serve with nuts, seeds, fruit, coconut, or yogurt on top.
This makes a large batch. I recommend making it early in the week and putting leftovers into mason jars so that you have individual portions in the fridge ready to grab and go for the week. Enjoy!
Wednesday, October 2, 2013
Quinoa and Avocado Veggie Bowl with Lemon Tahini Dressing
Check out this recipe and more on the new site!
Last week marked the autumnal equinox, the end of summer and the beginning of fall, a day when sunlight and darkness are equal in balance. As this day approached I was feeling completely out of balance. In an effort to "reset" myself, I decided to try a juice cleanse. I had tried one five years ago, but I wasn't as invested in my health at that point in time, so I decided to give it another shot.
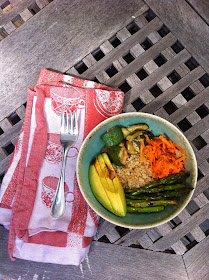
While I know that many people benefit from juice cleanses, I can now safely say that juice fasting is not for me. As someone who typically has a good relationship with food, I suddenly felt obsessed. I was so hungry that I was craving junk foods that have never interested me. I don't normally have any "rules" about what I eat. I simply eat what appeals to me while trying to make the most nourishing choices I can. But as soon as foods were off limits, they were all that I could think about. Half way through the third and final day I decided to break the cleanse. I was so hungry that I knew if I kept it up I'd end up eating something unhealthy. By stopping early I was able to make a more sensible yet delicious choice: quinoa and avocado veggie bowl with tahini lemon dressing.
I'd rather create an ongoing healthy lifestyle than do a few days of extreme cleansing. But that is what works for me. It may be worth trying a juice fast to find out what works for you.
You've probably heard plenty about quinoa as it has become popular as a superfood, grain alternative. Although quinoa cooks and tastes like a grain, it is actually a seed. Grains are incomplete proteins, which is why it is recommended that they be paired with beans and legumes to provide the complimentary amino acids. Quinoa is a complete protein on its own. For an added nutrient boost, try red or black quinoa which have even more antioxidants.
I recommend making a large batch of quinoa when you make this. That way you already have it on hand for a breakfast porridge with almond milk and fruit or in place of rice for dinners throughout the week.
Quinoa and Avocado Veggie Bowl with Lemon Tahini Dressing
Ingredients:
Makes 2 large servings
1 cup cooked quinoa (cooks like rice with 2:1 water to quinoa ratio)
1 zucchini, cubed
10 stalks asparagus, halved
1 tbsp coconut oil
1-2 carrots, shredded
1/2 avocado, sliced
1 tbsp organic tamari sauce
1 tbsp tahini
juice of 1/2 lemon
2 tbsp water
1 tsp honey
1. Spread zucchini and asparagus out on a baking sheet and drizzle with coconut oil. Add a pinch of salt and pepper and roast for 15 minutes at 400 degrees or until slightly browned. Flip the veggies halfway through cooking time.
2. In a small bowl whisk together tamari, tahini, lemon juice, water, and honey until smooth.
3. Put quinoa in serving bowls and add shredded carrots, sliced avocado, and the roasted vegetables.
4. Pour dressing over the veggie bowl and serve.
Tuesday, September 17, 2013
Mediterranean Lentil Salad with Fresh Figs
Check out this recipe and more on the new site!
This recipe came to me out of sheer chance. Funny how sometimes I brainstorm to try to create a "perfect" recipe and it turns out just "ok." Other times the perfect recipe just presents itself to me and is better than anything I could have planned. This is one of those perfect serendipitous recipes.
Sam and I were hungry at my parents house with a bag of groceries I had intended to take home. Between what we found in the grocery bag and ingredients from my parents sparse kitchen, I made what turned out to be the best salad I had ever had.
Lentils are a favorite of mine. And if you are a vegetarian, I highly recommend you make yourself familiar with these bad boys. Lentils are a great source of B-Vitamins and protein which many vegetarians are not getting enough of. But on top of that, they are loaded with fiber. Fiber is what keeps you full and what keeps your digestive system running smoothly. If you are new to lentils try them in soups. They add great texture to vegetable soups and lentil soups, such as Dal, are delicious and very affordable and easy to make.
Make sure you try this recipe while figs are still in season. Once they are out of season, you could make this without them or use dried figs or raisins, but nothing can replace the light and sweet flavor of fresh figs.
Mediterranean Lentil Salad
Makes two large salads
Ingredients:
2/3 cup cooked lentils, we used brown but any variety works
1 large cooked beet, cubed
1/2 avocado, cubed
5-6 fresh figs
1/3 cup sun dried tomatoes
1/3 cup artichoke hearts
1/3 cup feta or goat cheese
1 handful fresh greens, we used a mix but arugula or spinach would be especially nice
1 tbsp olive oil
balsamic vinegar to taste (about 2 tbsp)
black pepper
celtic sea salt
Combine all ingredients and serve.
Saturday, September 7, 2013
Maple Vanilla Baked Pears
Check out this recipe and more on the new site!
It's time to face it: summer is ending. Every year my heart breaks as I realize that the days are getting shorter, farmers' market season is dwindling (oh how I miss NYC where the markets are year round), and the cold weather is creeping in. But this year I'm not gonna let it get me down. This year I'm fully embracing autumn. I'm getting excited about all things fall: cool weather, leaves, changing...I've even picked a few apples already.
I also made this delicious dessert using one of my favorite fall foods. This simple way of preparing pears is so easy you won't believe it. I would highly recommend using this recipe when entertaining because it requires so little preparation and is really hard to mess up. Plus, it is incredibly delicious.
I should admit here, in the past I have not been the biggest fan of pears. They just never really appealed to me that much. I found the texture a bit mealy and just rarely chose them over other fruit. But I've come around. They have a refreshing sweetness you just can't find in an apple. And that mealiness? It's some serious fiber providing more satiety and helping to balance blood sugar. And think twice before you peel your pears. The skin is packed with antioxidants, flavonoids, and phytonutrients that support a healthy immune system and fight inflammation.
Ingredients:
Serves 2
2 pears (any variety will work)
1 tbsp maple syrup
1 tbsp coconut oil
1 tsp lemon juice
1/8 tsp cinnamon
1/2 vanilla bean scraped
Preheat oven to 350 degrees. Slice and core pears and place face up in a baking sheet. Whisk together remaining ingredients in a small bowl. Pour this mixture over the pears and bake for 20 minutes. Flip pears and spoon the juices in the pan on top of them. Return to the oven for an additional 20 minutes. Serve with coconut milk, mascarpone, or ice cream as a dessert or over yogurt or porridge for breakfast.
Wednesday, August 28, 2013
Summer Corn Salad
Check out this recipe and more on the new site!
Whoa. Summer is coming to a close and I haven't even shared one of my favorite summer dishes. One reason I haven't posted this is that I've been distracted by weather. I'll have plenty of time to work on the site when it's cold outside and I'm trapped indoors. Right? But another reason is this nagging idea of perfection. Sometimes I fall into a spiral of thinking that I should wait until I have higher quality photos, create more complex recipes, or find some other excuse not to post a recipe. And what happens when I think like that is nothing. I stop creating and I stop sharing. It's time to overcome that idea of perfection and share with you all a recipe that is not elegant and complex, but simple and beautiful. And the pictures may be low quality iPhone shots, but the important thing is to keep creating, keep sharing, and stop being so hard on myself. I feel better already.
This recipe is incredibly simple to make, yet crazy delicious. Whenever I make this, people ask for the recipe or beg me to make it again. And while it's still summer, I am trying to take advantage of eating these delicious seasonal foods while I can.
The star of this recipe is fresh raw corn. I have always loved the taste of raw corn. It is sweet and juicy and not nearly as starchy as cooked corn. I especially love putting it on vegetarian tacos. Such great texture and flavor!
But there is one major concern when it comes to corn: GMO's. Almost all corn sold in the United States is genetically modified. And currently there is no requirement that GMO products be labelled. But there is hope for those of us who would rather trust Mother Nature than corporately funded scientists to grow our food. Organic standards do not allow GMO's and some stores label their corn as non-GMO. Consider your power as a consumer: every purchase you make is a vote in favor of or against GMO's. Which way are you voting?
I found some beautiful red corn and mixed colors of cherry tomatoes that made for a beautiful rainbow of a dish. But the yellow corn and red tomatoes taste just as good, so don't sweat it if you can't find red corn. Just make sure you get non-GMO corn and get cooking before the summer vegetable season is over!
Ingredients:
2 ears of corn (non-GMO-we've talked about this)
1 avocado, diced
2/3 cup cherry tomatoes, halved
1/2 cup raw walnut pieces
juice of 1/2 a lemon
Salt and pepper to taste (about 1/8 tsp each)
1. Cut the corn kernels off the cob and place in a bowl with avocado, tomatoes, and walnuts.
2. Add lemon juice and salt and pepper and stir.
Thursday, August 15, 2013
Raw Cherry Pistachio Tart + Whipped Coconut Cream + Stewed Cherries
Check out this recipe and more on the new site!
I'm finally coming up for air. This summer has been a whirlwind. Between a luxurious beach trip, the first ever Naked Fig Dinner Party, a new nutrition client, and my regular cooking gig, I've been super busy. All this has been incredibly chaotic (albeit fulfilling and fun), and so it feels really blissful to sit peacefully by the river while I write this.
The Naked Fig Dinner Party was truly a blast. It was such an honor to share what I love to do with such a wonderful group of people. We dined outside, enjoying great food, wine, and amazing company. Inside, the talented Madeline Moore transformed the house into an art gallery for guests to view and purchase her work. Needless to say, we took home quite a few beautiful pieces. Overall, the event was a huge success and I can't wait to throw another one!
The best part of the dinner was definitely the dessert - a raw cherry pistachio tart served with whipped coconut cream and stewed cherries. I cannot begin to describe how delicious this was. You could just take my word for it, but if I were you, I'd make this one. Seriously.
This dessert tastes so indulgent, yet it doesn't have any refined sugar or flour. And it is gluten and dairy free too! Instead it is packed with fruits and nuts. Aside from being delicious and the epitome of Summer, cherries have anti-inflammatory properties. And both cherries and pistachios are antioxidant rich foods. Because the cake is raw, all the nutrition is intact. That means that this amazing dessert may help boost your immune system as well as your mood!
Raw Cherry Pistachio Tart
Ingredients:
Crust:
2/3 cup raw shelled pistachios*
1/2 cup raw walnuts
2/3 cup dates, chopped
1/4 tsp celtic sea salt
1/8 tsp cinnamon
*It can be hard to find raw pistachios. If you can't find them, it is ok to use roasted. Or if you really want it to be raw, use raw walnuts or pecans.
Filling:
2 cups cashews (soaked overnight)
2 tbsp water
Juice of 1 large lemon
1/2 cup raw honey
1 vanilla bean, scraped
1 cup pitted cherries
Stewed Cherries:
1 cup pitted cherries, sliced
2 tbsp coconut palm sugar
Tart:
1. Put all crust ingredients in a food processor and pulse. If the crust sticks together in your hands it is perfect. If not, add water or honey one tbsp at a time until desired texture is achieved.
2. Line a 9" spring form pan with plastic wrap. Press crust mixture into the bottom of the pan making as even a layer as possible. Put pan in the refrigerator while you work on the filling. Rinse the food processor.
3. Put all the filling ingredients except for the cherries into the food processor and mix until smooth. This may take longer than you expect, but just keep blending until creamy.
4. Pour about 2/3 of the filling on to the crust layer. Use a spatula to spread and create an even layer.
5. Add cherries to the remaining 1/3 of the filling in the food processor and blend until smooth (and bright pink/purple!). Pour all of the filling on top of the first filling layer and use spatula to make the layer even and smooth.
6. Place in the freezer until solid, about 2-3 hours. Move to the refrigerator about 30 minutes to 1 hour before serving.
Cherry Topping:
1. Put sliced cherries and coconut palm sugar in a saucepan on medium heat. Stirring frequently, cook until all the juices are released and cherries are tender.
Slice the cake and top with whipped coconut cream and stewed cherries.
You can find a how-to on whipped coconut cream in the Raw Avocado Tart recipe.
Wednesday, August 7, 2013
Summer Basil Rolls
Check out this recipe and more on the new site!
Last week my friend Alice asked me what I eat when I don't feel like cooking, haven't planned a recipe, or when the refrigerator is looking sparse. Great question! On my journey toward a more natural slow food diet I used to eat really well until I hit speed bumps. If I was really tired, didn't feel well, or simply wasn't inspired, I turned to takeout and processed foods. I'd know that somewhere in the pantry I'd find a bag of zero-nutrition crackers with a scary-long shelf-life. After eating I'd have even less energy than I had before.
Once I got to a point where I was buying almost no processed foods, eating like that simply stopped being an option. Now when I don't feel up to cooking, the choices for foods I can grab and eat are fruits, veggies, or nuts. And I often find that after a handful of cashews or an apple my energy comes back enough to prepare something substantial.
But I'm not always in the mood for twig-and-berries kinds of snacks, so I try to plan ahead for times when cooking isn't going to happen. When I make a meal with a grain (quinoa, farro, rice, etc.), I make a double batch of the grains to keep on hand in the fridge. And if I make soup, I always make more than I need so that I can refrigerate or freeze some. My freezer is always stocked with fruit for smoothies and I love to make flourless seed and nut breads and keep them in the freezer as well.
I also try to come up with recipes that don't require a trip to the market. It is actually like a fun game to challenge myself to make a complete meal with ingredients I have on hand. Sometimes it is hard to let go of the idea that if I just had one more ingredient it would be perfect. But I can stand to learn to be more flexible.
Kohlrabi is all over the farmers' markets around here right now. If you've never tried it, its appearance can be intimidating. They can be purple or green and look like something out of a sci-fi movie. But for their dramatic appearance the flavor is actually simple, sweet, and mild. They have sort of a cabbage-turnip flavor to them. Kohlrabi is low in calories but high in fiber and Vitamin C. Eat them raw or try roasting them. Delicious either way!
This recipe is a great way to make a meal when you think you've got nothing to eat. You can use almost any combination of fresh vegetables and they always seem to taste good. I got sunflower sprouts, fresh basil, and kohlrabi at the local farmers' market. If I made these at a different time of year I'd just swap out for whatever vegetables happen to be in season. If you can't find kohlrabi for this recipe substitute carrots, cabbage, turnips, or radishes. That's the beauty of this recipe. It is super flexible.
Summer Basil Rolls
Makes 8 rolls. If you don't feel like slicing the beets and kohlrabi, you can save some time and work by running them through the food processor.
Ingredients:
8 sheets of rice paper
8 large basil leaves (use lots of small leaves if you don't have large ones)
1/8 cup sesame seeds
1 beet, julienned
1 kohlrabi, julienned
1/2 cup snow peas, julienned
1 avocado, sliced
1. Fill a wide shallow bowl or a deep plate with warm water. Submerge a sheet of rice paper for about 20 seconds. Remove rice paper and lay flat on work surface.
2. Sprinkle rice paper with a spoonful of sesame seeds.
3. Thinking of rice paper as a clock, lay a large basil leaf on the paper from 11 to 6. Put a little of each vegetable evenly on top of the basil leaf.
4. From the left side (6 on a clock), fold the paper just enough to cover the filling. If you've ever folded a burrito, this is the same strategy.
5. From the top (12:00) fold the rice paper down about 1.5-2 inches. Do the same from the bottom (6:00).
6. Starting from the left (9:00), roll the rice paper all the way across.
7. Repeat until all ingredients are used up.
After all that folding I am usually too excited about eating to make an elaborate dipping sauce. I usually just use tamari sauce with a few drops of chili oil and maybe some raw almond butter whisked in. But get creative with it! Miso, tahini, lemongrass, and garlic all make great ingredients for sauces. Or use the orange peanut dipping sauce recipe from the Baked Vegetable Pockets.
Monday, July 29, 2013
Refreshing Honeydew Mint Sorbet
Check out this recipe and more on the new site!
Just when I thought there was no way we would make it to the beach this Summer, the universe surprised me with an opportunity to spend a few days on a beautiful island. It was pure bliss. As a child I took it for granted that every Summer we went on a beach holiday. Now as an adult, I see how special it is to find time in our busy schedules and money in our limited budgets to spend time together in such an idyllic place as the seaside. For that I am overwhelmingly grateful.
One blissful thing about the coast is the plenitude of fresh produce. The warm, moist climate means tons of local fruits, veggies, and herbs. And in the summer sun and heat, produce is exactly what I want.
To stay cool I made this incredibly simple and refreshing Honeydew Mint Sorbet. The ingredients can't get any simpler: purely honeydew and fresh mint. The result is an amazing and cooling dessert with absolutely no guilt. I kept thinking to myself while eating it that maybe I had added a touch to much sweetener. Then I remembered I had added none! The honeydew was just that divine.
The fact that this dessert recipe has no added sugars is enough to convince me to make it, but the benefits of honeydew and mint are persuasive as well. Honeydew is rich in Vitamin C and copper which are both important for healthy skin (amongst other things). And mint is an excellent source of Vitamins A and C. Another reason to eat mint after a meal is that it can be soothing to the digestive system. Plus, if you are at the beach, the honeydew will rehydrate while the mint cools - the perfect Summer combination.
So embrace the simplicity and enjoy this sweet healthy treat!
Refreshing Honeydew Mint Sorbet
Ingredients:
1 honeydew melon, sliced
1 oz. fresh mint leaves
1. Put all ingredients in a blender and blend until smooth.
2. Either follow the instructions on your ice cream maker (the house we stayed at had one) or put the mixture in a container in the freezer.
stirring occasionally for a few hours until desired texture is achieved. If left too long, it will become too solid. In this case, either scrape with a fork for a granita style dessert or put the bowl in the fridge to thaw a bit.
I should add:
I'm not much of a drinker but my boyfriend, Sam, added a pinch of coconut rum to his and it was delicious. I still prefer the unadulterated version, though.
Tuesday, July 23, 2013
One Crust Two Ways! Strawberry Basil Tarts + Tomato Ricotta Tart
Check out this recipe and more on the new site!
Today is a two-for-one! Using this one crust recipe you can decide to make sweet Strawberry Basil Tarts or a savory Tomato Ricotta Tart. Or both! And if you are gluten-sensitive, this is your lucky day. Both delicious options are gluten-free.
As you may have noticed by now, I like to find ways to swap out white flour for more nourishing foods and this particular swap adds tons of flavor to the tarts. The magic behind the recipe is the almond meal crust. Because almonds are high in fat, they create a rich, buttery tasting crust and a more complex flavor than white flour.
Almonds are high in protein, fiber, and healthy fats. Many people, especially dieters, stay away from high fat foods because they are high in calories and people think they led to weight gain. On the contrary, healthy fats like the ones in almonds help prevent weight gain and promote healthy skin and hair. Almonds are also high in Vitamin E, riboflavin, and trace minerals. Another great thing about almonds is that they taste great sweet or savory, which is why I'm sharing with you one tart crust recipe two ways.
Strawberry Basil Tarts + Tomato Ricotta Tart
Note: These can be made into mini pies (about 8) in a muffin tin or as a whole tart in a tart or pie pan. I made the sweet ones as mini pies and the savory as a whole pie, but the choice is yours. The mini tarts bake for 20 minutes while the large tart bakes for 30. Also, this recipe is for enough crust to make either the sweet or savory tarts. To make both, double the crust recipe.
Crust:
2 cups almond flour
1/4 tsp salt
1 egg
2 tbsp melted coconut oil
1. Preheat oven to 375 degrees. Combine almond flour and salt in a large bowl and stir.
2. In a small bowl, whisk together egg and coconut oil.
3. Add egg/oil mixture to the flour and stir. Using your hands, knead mixture until dough is uniform.
4. Press dough into tart pan or muffin tin. This dough will fall apart if you try to roll it out. Trust me. So just press it into the pan to create a crust.
5. For the berry tarts: Divide the berry mixture amongst the muffin tins and bake for 20 minutes. Allow to cool and pry out using a spoon.
For tomato tarts: Spread cheese evenly over the crust. Spread tomatoes out on top. Bake for about 30 minutes. Top with chopped scapes. Slice and serve warm or at room temperature.
Berry Mixture:
1.5 cups sliced strawberries
2 tbsp coconut palm sugar
2 tbsp finely chopped fresh basil
1. Stir all ingredients together and set aside to allow flavors to combine.
Tomato Topping:
1 cup sliced cherry or grape tomatoes
Pinch of salt
Pinch of pepper
4 oz. sheep's milk ricotta
1 tbsp chopped scapes (if you can't find scapes try green onions or an herb of your choice)